Overview
This guide will walk you through the steps on how to use the IfThenGive plugin for your website. If you need help installing or configuring the plugin prior to getting to this point, take a look at our install and setup guide before moving forward here.
Add a New Goal
As a site owner or administrator, the first task is to add a new goal.
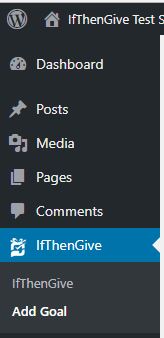
1. Navigate to IfThenGive->Add Goal.
2. Enter the details of the goal such as Goal Name, Goal Label, Description, and add an appropriate Image for the goal.
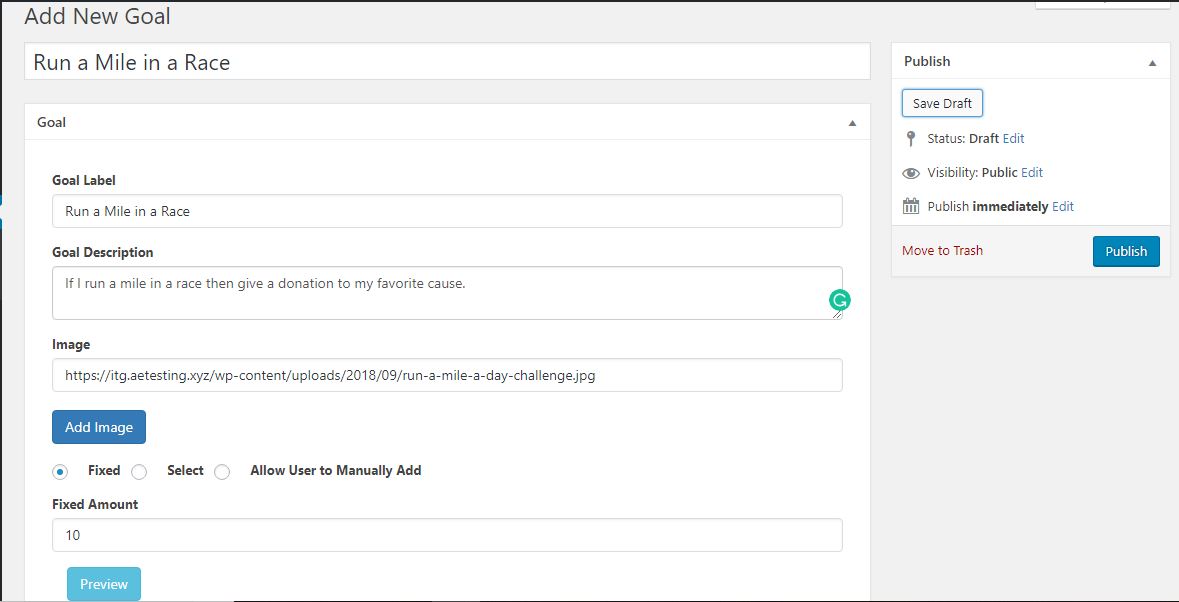
3. The payment amount for the goal can be determined in a variety of ways. You can have a pre-determined amount that you want to receive from each giver or allow givers to set their own custom donation amount, or choose from different options.
- Fixed: This lets you fix one amount for all givers to this form.
- Select: This lets you provide different payment options for the givers.
- Allow user to manually add: This lets the giver to manually add the amount.
4. Click Preview to see how the goal appears on the website and Publish it.
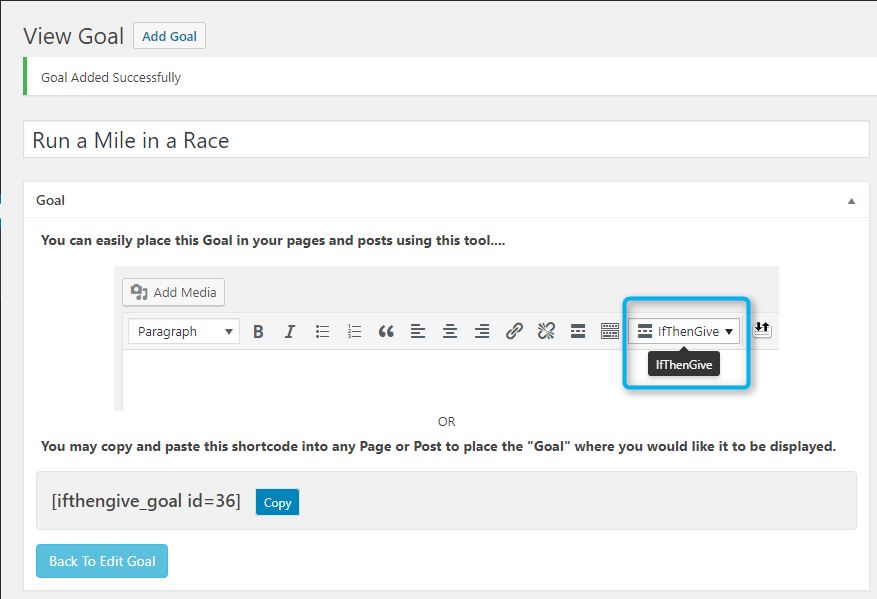
5. The goal has been added successfully. At this point, you’ll notice that a shortcode is generated for the form. Click Copy to copy the code and paste it on your website.
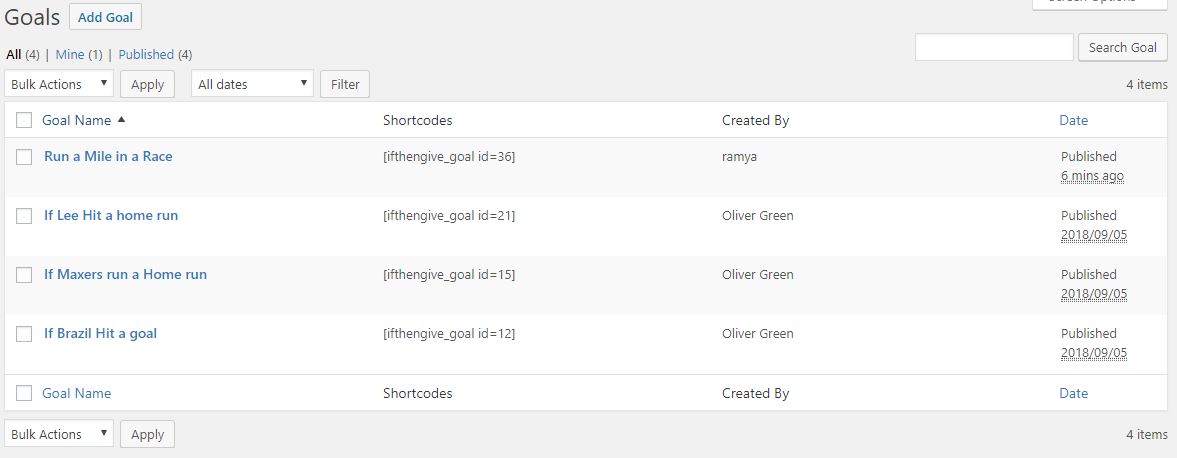
6. On the main menu, click IfThenGive to view the list of goals that you have created.
Manage Goals
Once you have created new goals, you can edit or delete them as required.
1. On the main menu, click IfThenGive to view the list of goals that you have created.
2. Place the cursor on the goal name and click Edit to edit the details of the goal.
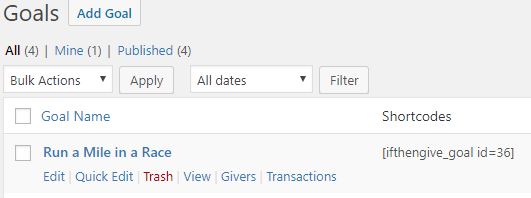
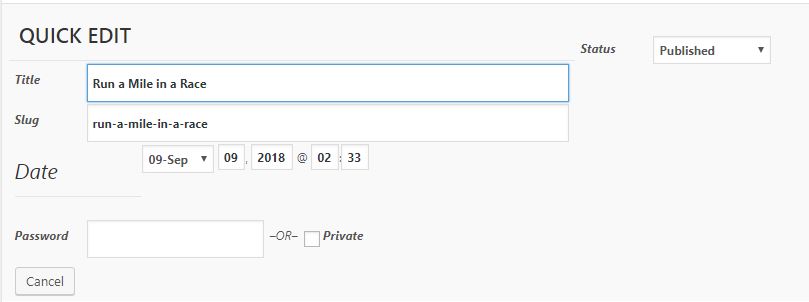
3. Click Quick Edit to change the name, or to set a password for the goal.
4. Click Trash to delete the goal.
Manage the List of Givers
The Givers page is where you get an overview of the givers on your website. From here, you can filter and sort your givers, search, and delete them, and also process donations as required.
Manage Givers
1. On the main menu, click IfThenGive to view the list of goals that you have created.
2. Place the cursor on the goal name and click Givers. This list of Givers is displayed. Let us understand each column in detail.
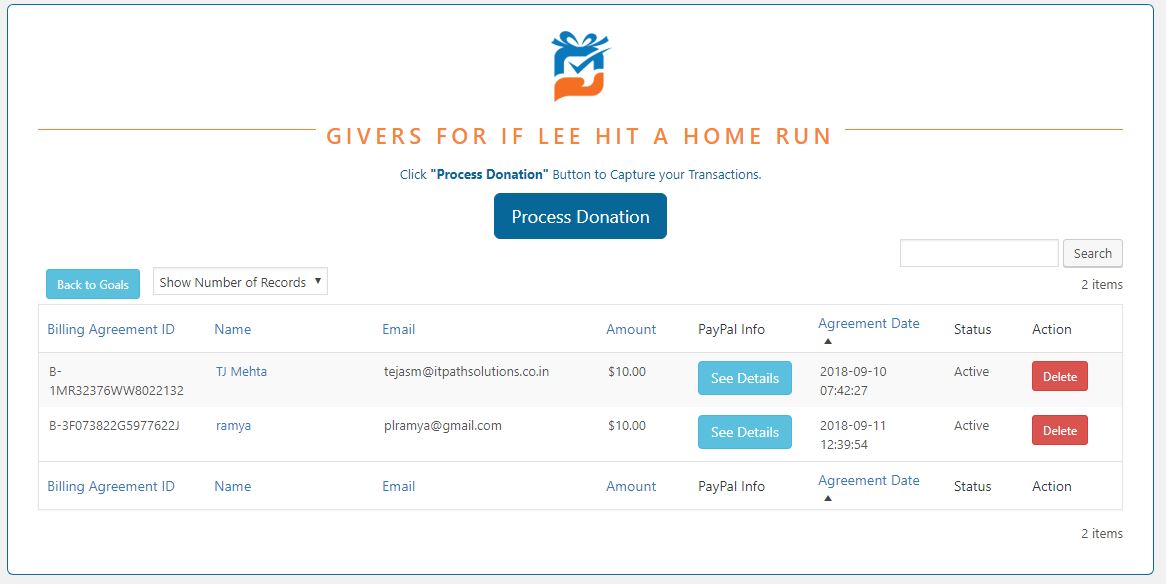
- Billing Agreement ID: This column displays the billing agreement ID from PayPal.
- Name: This column displays the name of the giver.
- Email: This column shows the email id of the giver.
- Amount: This shows the amount donated by the giver.
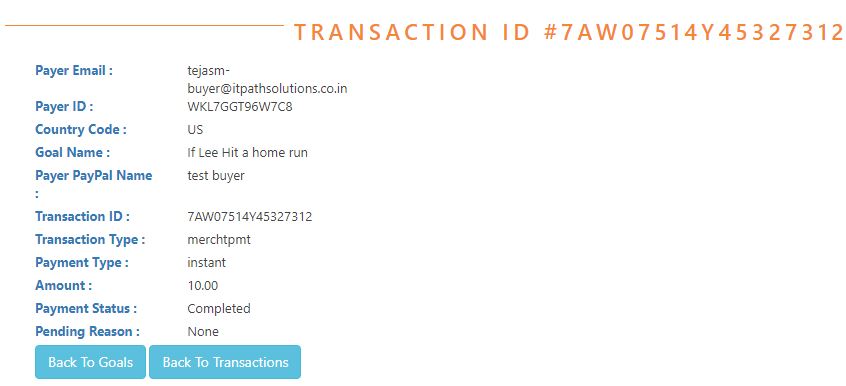
- PayPal Info: Click See Details button in this column to view the Email and PayerID from PayPal.
- Agreement Date: This is the date that the giver signed up on the website.
- Status: This shows the current status of the donation payment as set by the giver. For example, if the giver “suspends” the goal, then the donation will not be processed and it will be displayed as Suspended.
- Action: Click Delete to delete the particular record.
2. Click Show Number of Records drop-down to display the number of records.
3. Click on the Givers Name to see the list of transactions of that particular giver.
4. Click Back to Goals to go back to the list of goals page.
Process Donations
If we assume that the event has happened, then as a website owner/administrator, you need to process the donations received by the givers.
1. On the list of goals page, click Process Donation. A pop-up appears asking for confirmation.

2. Click Ok to confirm the process. The donation process happens in the background and the transaction will continue until all the active givers on the list get processed. If there is another process running in the background and you click on Process Donation, a pop-up appears with two options:
- Continue With Remaining Process: Click on this button if the process gets stopped due to a timeout or a shutdown.
- Start Over: Click on this button to start the process all over again.
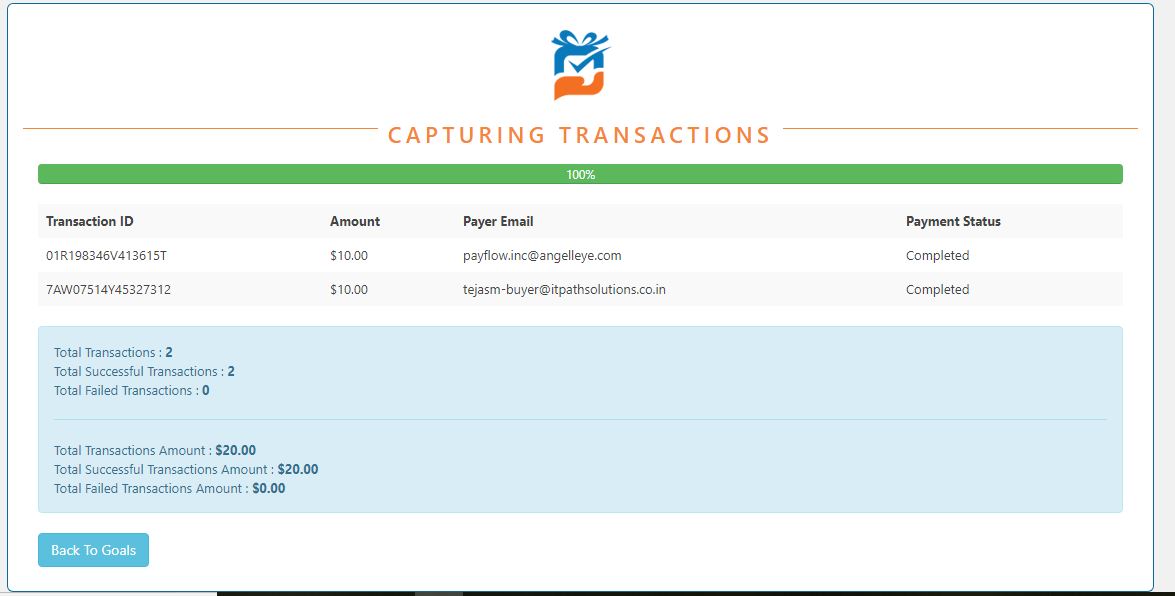
3. The details of the transaction such as Transaction Id, Amount, Payer Email, and Status is shown. You can also see the details of total successful, and failed transactions etc.
4. You will also get an email with the transaction report, which can be printed/downloaded in the form of a pdf.
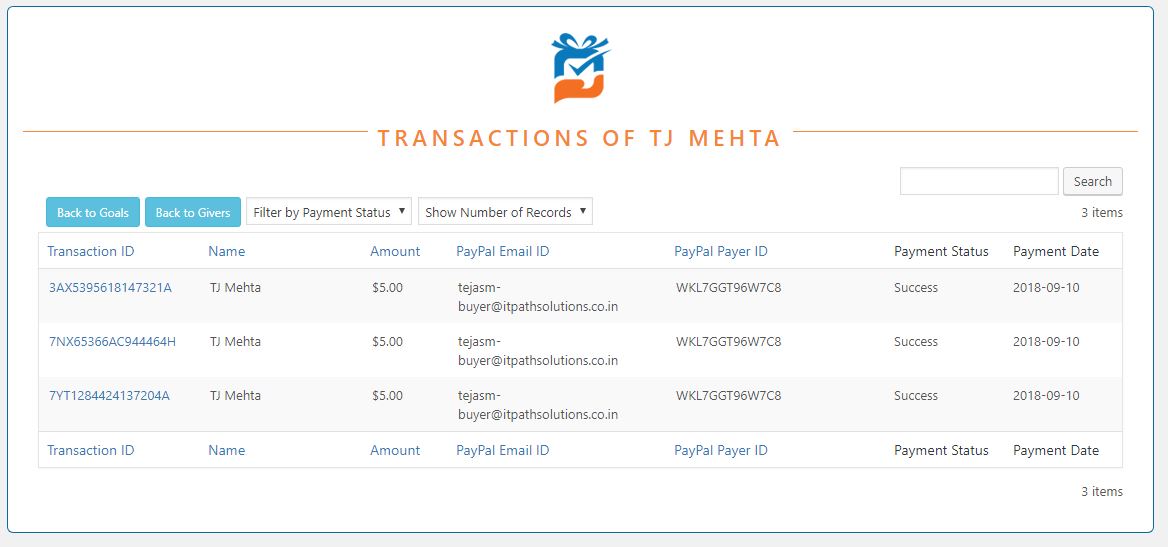
Manage the List of Transactions
This page gives you an overview of all the transactions that have been processed for the givers of a particular goal.
1. Place the cursor on the name of a goal and click Transactions. This list of transactions is displayed. Let us understand each column in detail.
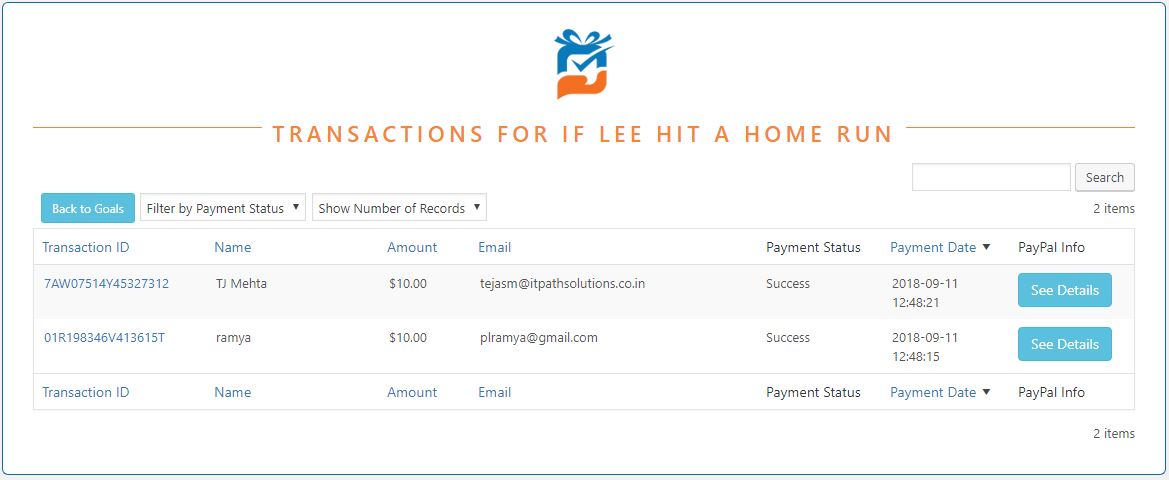
- Name: This column displays the name of the giver.
- Email: This column shows the email id of the giver.
- Amount: This shows the amount donated by the giver.
- PayPal Info: Click See Details button in this column to view the Email and PayerID from PayPal.
- Payment Date: This is the date that payment has been processed.
- Payment Status: This shows the current status of the transaction.
- Transaction ID: This column displays the ID of an individual transaction. Click on this link to view the details of the transaction.

2. Click Filter by Payment Status or Show Number of Records drop-down to filter the list of records accordingly.
3. Click Retry Failure Payments to process the failed transactions. When the transaction is processed, the status will be changed to success and will be shown on the page.